Dural's advice · from the ebook “From Egg to Hen”
Your chicks have hatched. The first few weeks decide everything: a chick can't regulate its own temperature until it's three to four weeks old, and it doubles its weight in a matter of days. During this window, you stand in for the mother hen. Here are the five things that make the difference.
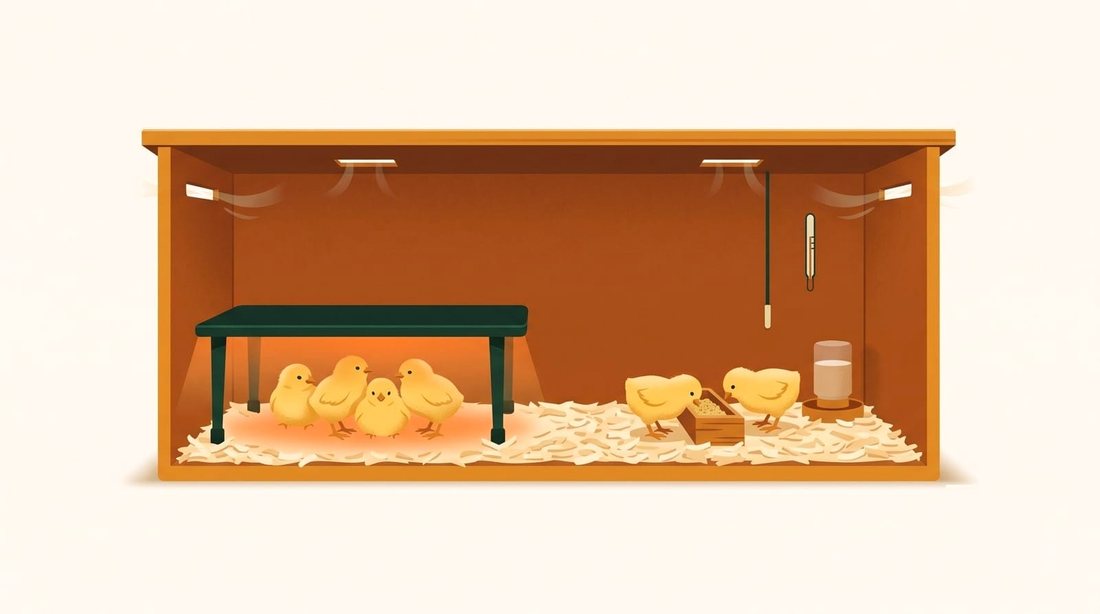 Heat plate
Thermometer
Drinker
Feeder
Bedding
Ventilation
Warm zone
Cool zone
Heat plate
Thermometer
Drinker
Feeder
Bedding
Ventilation
Warm zone
Cool zone
Newly hatched, a chick is soaked and exhausted. It needs twelve to eighteen hours to dry off and get its strength back, and it should spend them in the incubator. Taking it out wet chills it sharply at the worst possible moment.
There's no rush: just before hatching, the chick absorbs the yolk of its egg. That reserve feeds it for 48 to 72 hours. So it can stay in the incubator without food or water until the whole clutch has hatched.
This is the most important point in this article. A cold chick dies within twenty-four hours. An overheated chick dehydrates and stops feeding. Between the two the margin is comfortable, as long as you follow the step-down.
| Week | Under the heat source | Marker |
|---|---|---|
| 1 | 35 °C (95 °F) | Arrival in the brooder |
| 2 | 32 °C (90 °F) | First feathers appear |
| 3 | 29 °C (84 °F) | They explore more |
| 4 | 26 °C (79 °F) | They move off the heat on their own |
| 5 | Gradual switch-off | Depending on room temperature |
Before you even look at a number, look at your chicks. How they arrange themselves in the brooder tells you everything, at a glance, and it's the most reliable read there is.
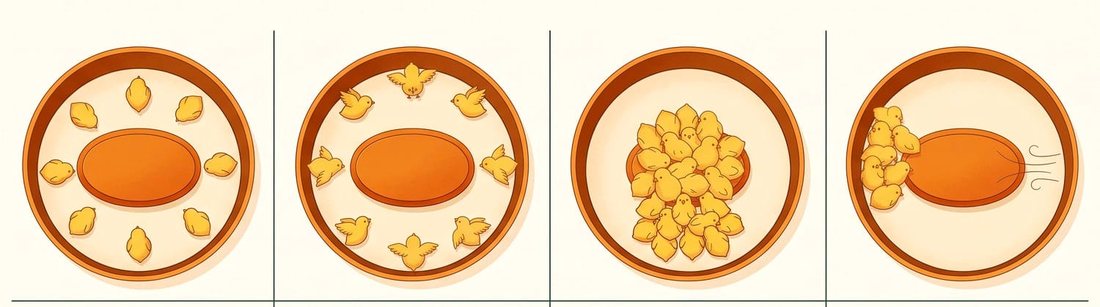 Just right
Too hot
Too cold
Draught
Just right
Too hot
Too cold
Draught
| What you see | What it means | What you do |
|---|---|---|
| Spread out, calm, active | All is well | Nothing |
| Piled up under the heat source | They're cold | Lower the plate or raise the setting |
| Away from it, wings spread, panting | They're too hot | Raise the plate or lower the setting |
| Bunched to one side | A draught | Find the leak and block it |
A chick without water dies within twenty-four to forty-eight hours. It's the first thing it should find on arrival, even before food.
A chick grows at a rate it will never match again. It needs a proper starter feed, at 18 to 20% protein, in fine crumbs for its small beak. Table scraps, bread and whole grains won't do: they're too low in protein and too big to swallow.
Damp bedding is where most health problems in the brooder begin. It chills the chicks, sticks to their feet and harbours everything you don't want to see take hold.
At around four to five weeks, the heating comes off and the chicks become pullets. Going outdoors, then joining the coop, happens gradually, once they're fully feathered.
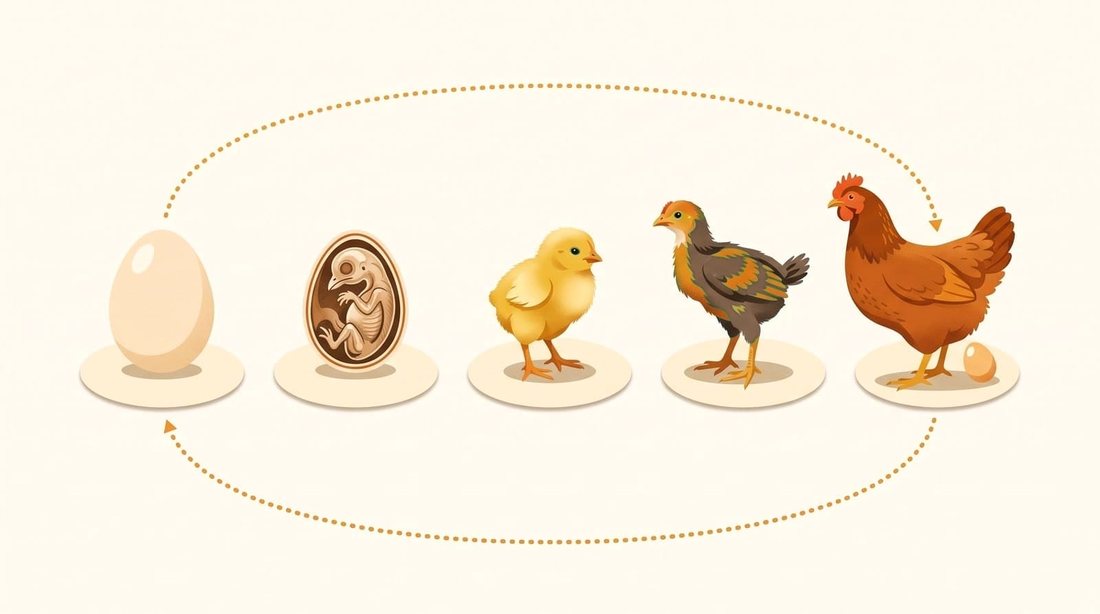 The egg
Embryo · D14
Chick · 1 day
Pullet · 3 months
Hen · 5-6 months
The egg
Embryo · D14
Chick · 1 day
Pullet · 3 months
Hen · 5-6 months
Well-managed warmth, clean water, a good feed and healthy bedding: keep those four in hand and the first weeks pass without trouble. For the detail on heating, our heat plate or heat lamp comparison settles the question with the numbers, and the brooder chapter of the guide covers every step.