Dural's advice · from the ebook “From Egg to Hen”
A reliable incubator does half the work. The other half is what you do over 21 days. The good news is that failed hatches almost always come down to a handful of well-known reasons, every one of them avoidable. We see them come up every week at customer support, often in the same order.
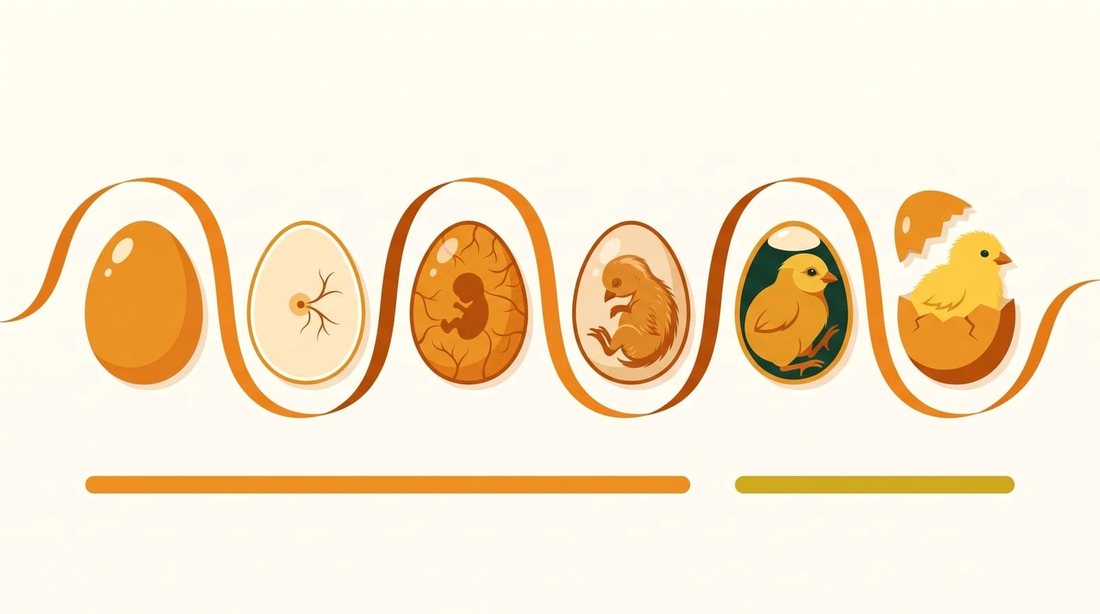 D1
D3
D8
D14
D18
D21
Incubation · D1 to D18
Hatching · D18 to D21
D1
D3
D8
D14
D18
D21
Incubation · D1 to D18
Hatching · D18 to D21
An incubator holds 37.5 °C (99.5 °F), but it does so far more easily when its surroundings are steady. In a cold garage, a sun-baked conservatory or a room that swings from 12 to 25 °C (54 to 77 °F) over the day, it fights constantly and the inside temperature drifts. And it's those swings, more than the absolute figure, that wear the embryo down.
It's tempting to check on your eggs, especially the first time round. But every time you open the lid, temperature and humidity drop at once, and it then takes long minutes to bring them back. A broody hen, by contrast, only leaves her nest for ten to twenty minutes a day.
Many beginners close the vents to hold in humidity. It's exactly the wrong move: the embryo breathes through the roughly ten thousand pores in its shell and uses oxygen constantly, more and more as it grows. A poorly ventilated incubator slowly suffocates the clutch.
It's the number-one question our support team gets, and it almost always comes from too much water. Too much early on stops the air cell forming and leaves the chick no room to turn. Too little, and the membrane dries and hardens: the chick stays stuck inside, unable to finish hatching.
| Phase | Temperature | Humidity | Turning |
|---|---|---|---|
| D1 to D18 · incubation | 37.5 °C (99.5 °F) | 45 to 55% | On |
| D18 to D21 · hatching | 37.2 °C (99.0 °F) | 65 to 75% | Off |
→ Swipe the table to see all the columns.
Before the sixth or seventh day there is simply nothing to see: the embryo is still too small to read. Candling on day 3 tells you nothing and chills the eggs for no reason. At the other extreme, a candling session that drags on, eggs taken out and handled one by one for twenty minutes, does more harm than it yields information.
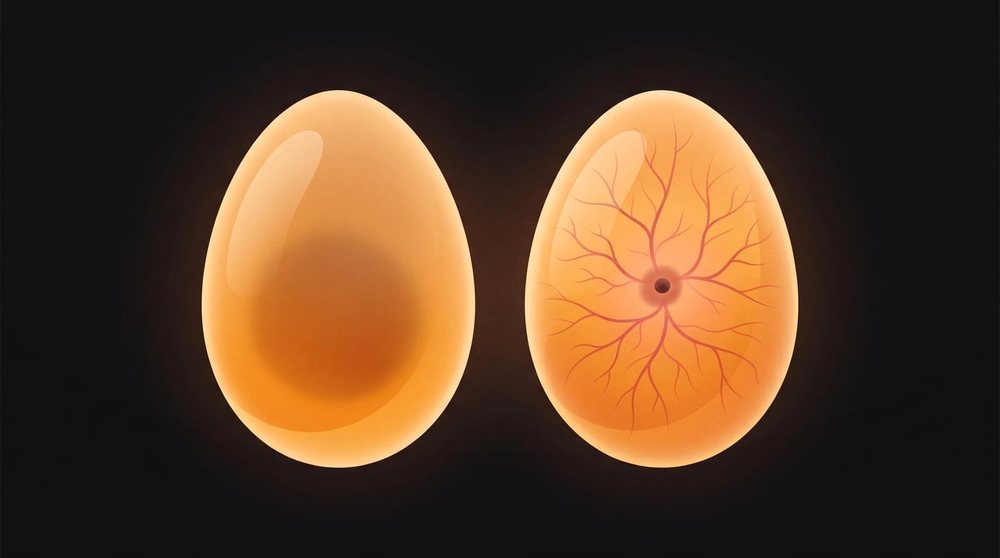 Infertile, clear
Fertile, star of vessels
Infertile, clear
Fertile, star of vessels
This is the most common mistake, and by far the hardest to resist. Watching a chick struggle for hours is hard to bear, and the urge to step in comes from the right place. But a chick normally takes up to twelve hours to break out of its shell, and all that time it is still drawing in the blood vessels that connect it to its membrane. Opening the shell for it causes a haemorrhage that is usually fatal.
A warm, damp incubator is a perfect breeding ground. Residue from one hatch contaminates the next, and the hatch rate collapses for no obvious reason, cycle after cycle.
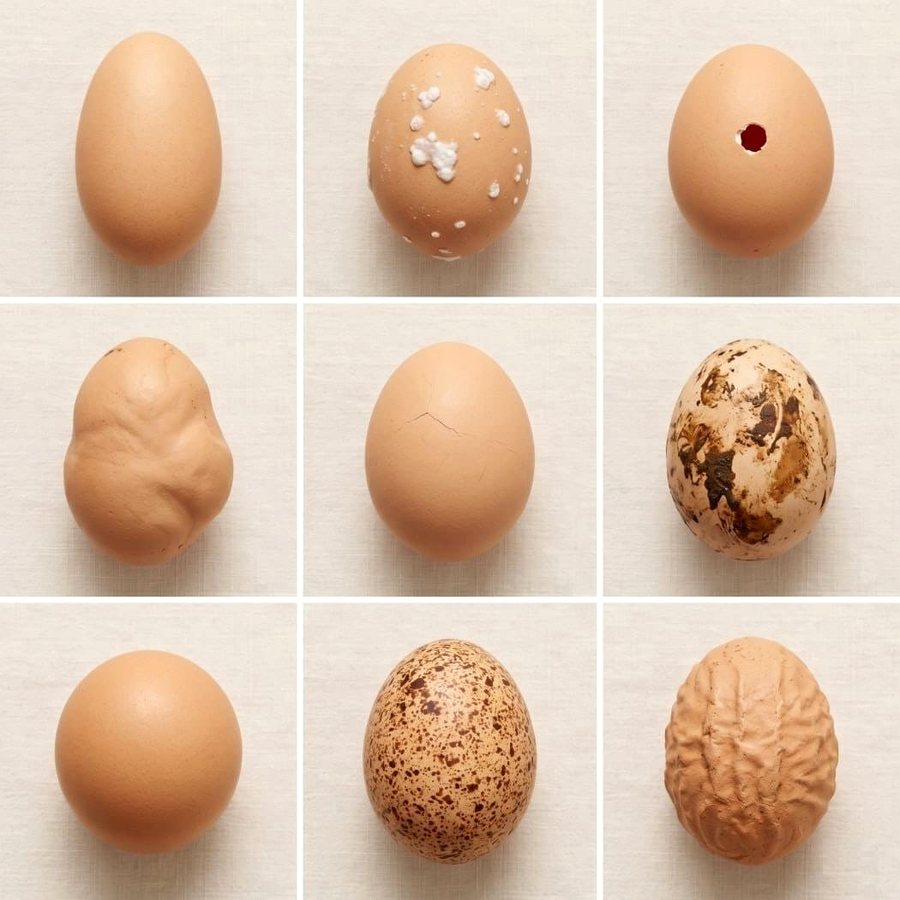
No setting can rescue an egg that should never have gone into the incubator in the first place. A hatching egg is less than ten days old, ideally between three and seven, has been stored point-down at 12 to 15 °C (54 to 59 °F), and has never been washed: the shell's natural protective film is what keeps bacteria out.
 Elongated
Calcified
Pinholed
Misshapen
Micro-crack
Soiled
Round
Mottled
Wrinkled
Elongated
Calcified
Pinholed
Misshapen
Micro-crack
Soiled
Round
Mottled
Wrinkled
One last reminder that saves a lot of disappointment: one incubator, one species at a time. Incubation times and settings differ too much from one species to another to run them side by side.
| The mistake | The right habit |
|---|---|
| Cold or sunny room | Steady room, 18 to 20 °C (64 to 68 °F) |
| Opening it repeatedly | Once a day, none after D18 |
| Vents closed | Open at all times |
| Humidity by guesswork | 45 to 55%, then 65 to 75% |
| Candling on D3 | First candling on D8, five minutes |
| Helping at hatching | Never step in |
| Incubator left uncleaned | Wash and disinfect before every cycle |
None of these mistakes is disastrous on its own. It's their build-up that makes the difference between a disappointing hatch and a successful one. Avoid them, and a first hatch usually goes well.
To go further, our incubation guide walks through every stage day by day, and the timeline calculator gives you your candling, lockdown and hatching dates from the day you set the eggs.